A few days back when I returned from Delhi, I opened my makeup drawer to realize that it was an utter mess. The Lipsticks were all over the place and if any/some of them were missing then I would not be able to figure it out.
To my horror I even figured that one of my favorite Clinique lipsticks was not only half open but broken as well! This really really made me scream (on the inside; I'm trying really really hard to keep my peace these days!!!)
Now at my place we have a couple of maids doing the rounds throughout the day and it's very difficult to put the blame on anyone, especially when I'm at fault for not organizing my stuff properly. Therefore, I tried my hand at this simple lipstick DIY organizer which I made in less than 30 mins! Read on to know how :)
Step 1. Take an old cereal box/cardboard box where the cardboard is not very thick and find an old plastic container as shown in the pic below
Step 1.1: Cut out strips of cardboard from the box as thick as the height of the container and as wide as the length of the longest side of the container (as shown above)
Step 1.2: Decide on the number of partitions you would like to have in your organizer and then draw lines on the strip of cardboard which you have cut out in Step 1. Make sure not to draw the lines through the entire length of the strip and take about an inch of section for the lines to be drawn (as shown in figure above)
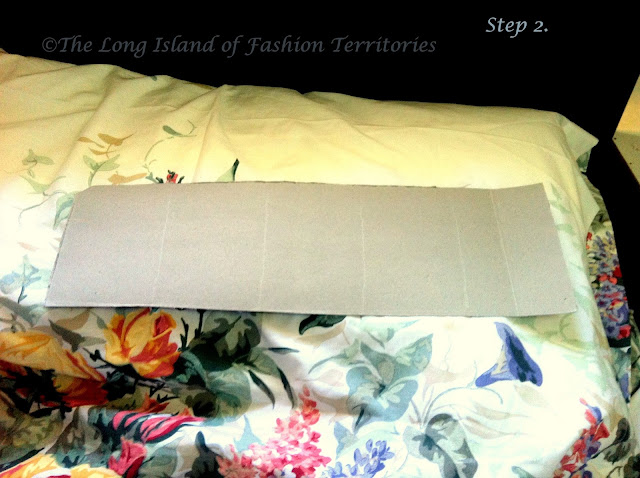
Step 2: Cut strips of cardboard which are as wide as the breadth of the container and as tall as the height of the container. (as shown in the pictures above and below)
Step 3: Draw a line parallel to the length of the cardboard strips which you have cut out in Step 2 and make sure that line is as wide as the line which you drew parallel to the base in step 1.2 above. Also divide the length of the strip of cardboard with as many lines as you had strips in Step 1 above.
Step 3.1: Now leaving the width of the line from the base, cut out the cardboard strip along the lines which you drew in Step 3 above.
Step 4: Fix the strips in such a manner that they get interlocked with each other and in the container and you are done!
Even though it may look untidy, once you fill it up with your favorite lip products it will look delicious!
A few of the columns were too big so I put two lipsticks in a column ;)
The reason why this idea is better than putting all your lipsticks in an empty container without columns is because these columns help the lipsticks from falling on each other.
I drew inspiration from Vicky of 'Caught in a Daze' who did her DIY in an impeccable manner!
Hope you enjoyed this DIY and do let me know how you liked it!
Until tomorrow!!!
Love Ya All :-*


